Dust Covers, Upholstery Supplies
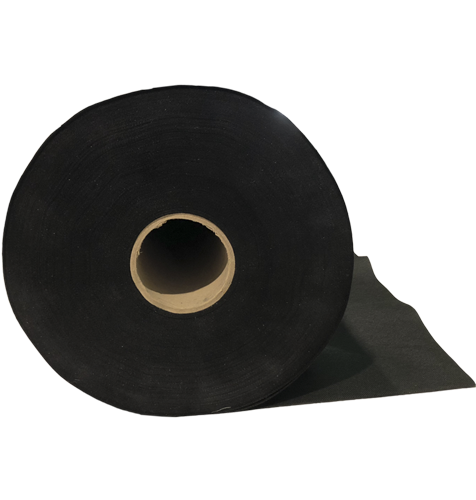
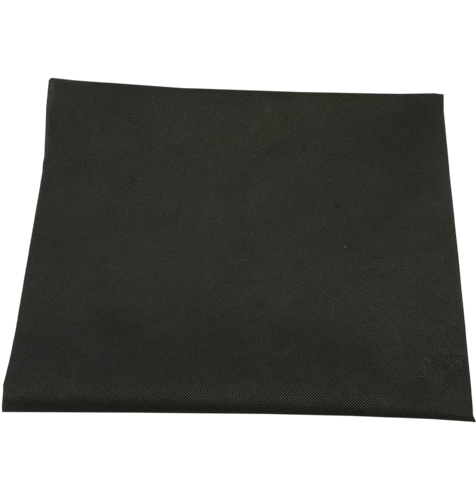
Upholstery Dust Cover Fabric
$2.88
In stock
A very durable black base cloth 110cm wide of spun-bonded non-woven lining for covering the bottom of all types of upholstered furniture. Can be used under seat cushions or in other areas to cover the frame, great as a barrier material for seat springs etc... At a standard 110cm wide, it's ideal for all dining chairs, lounge chairs, sofas, and even recliners. Upholstery Grade Thickness & Quality. At 70gsm thick, will not tear, go brittle or turn to dust. Suitable for use on interior and exterior furniture. Easy DIY - Achieve Professional Results! The lightweight yet sturdy design of our furniture underlining cloth makes it a great choice for both DIY enthusiasts and professionals alike. read more
- Description
- How To Tutorial
- Reviews (2)
- FAQs
- Add a review
Description
Dust Cover Commonly Used by All Manufacturers
Sofa, recliner and lounge manufacturers use this exact material on the bottom of the furniture to block out the internal structure to prevent insects entering and people looking inside. Whether you are replacing the same material type or have a hessian, polypropylene, cambric or calico material or starting out a new project our spun bonded dust cover will do the job!
Ideal For Professionals and DIYers
If you are in either the Upholstery, soft furnishing or trimming trades our spun bonded material is an essential basic stock item to have for all those repairs and recovery jobs!
For DIY repairs and restoration projects this material is super easy to work with as it can be sewn to either leather or fabrics and staples and cuts to size to fit any size item.
Suitable For Multiple Uses
Spun bonded material is also frequently used as a lining material for upholstered items, like the outside backs of recliner chairs, under the seat cushions or as a barrier material for the springs against the seat foam etc….
What You'll Need to Easily Replace a Dust Cover
See the tab “How To” for step-by-step instructions on how to replace a dust cover. What tools you’ll need are as follows:
New Dust Cover
Scissors
Stapler
Pliers
Allen Key or screwdriver
Pen
Staple Lifter (or Flat head screwdriver)
Save Time & Money and Do It Yourself
With our wide range of repair products, our easy step-by-step instructions and video tutorials, you’ve got everything you need to repair it yourself. Feel great about having done the repair yourself and saved $$$ on the repair.
How To Tutorial
How To Tutorial
- Carefully turn over the dining chair and use a sheet to protect the frame and remember to practice safe lifting techniques
- Unscrew and remove the seat pad base from the dining chair frame if required
- Note the direction of the front of the seat pad with a pen
- Using a pair of pliers remove all staples
- Discard original dust cover
- Lay the new Sofa Rehab’s dust cover over the seat base and trim cover to slightly wider than base
- Fold the dust cover in half and snip the centre point
- Locate the front edge of the seat pad where it’s been marked and lay the dust cover down with the cut out at the front centre
- Place the first staple at front centre and then one staple to left and right front corners
- Repeat process for rear and side edges folding over the edges straight and pull the cover tight
- Fill in the gaps with staples spacing a thumbs width apart is ideal
- Reattach the seat pad base to the dining chair frame
- Turn over the dining chair, using safe lifting techniques
- Test the chair
- Carefully move the furniture into space, use a sheet to protect the floor turn over the furniture remember to use safe lifting practices
- Unscrew and remove the legs, feet or attachments from the base if required
- Using a pair of pliers remove all staples
- Discard original dust cover
- Lay the new Sofa Rehab’s dust cover over the seat base and trim cover to slightly wider than base, two finger wide is perfect
- Fold the dust cover in half and snip the centre point
- Locate the rear edge of the furniture and lay the dust cover down with the cut out at the rear centre
- Place the first staple at rear centre and then one or two staples to left and right rear corners
- Repeat process for front and side edges folding over the edges straight and tight
- Fill in the gaps with staples spacing a thumbs width apart
- Reattach the legs,feet and attachments to the furniture base
- Turn over the furniture again using safe lifting techniques
- Test the furniture
Reviews (2)
Thank you for making an effort to leave a reivew but to protect against spam we only accept reviews from verified owners. Please proceed to login using the same email address you used when ordering the product.
Customer Login
FAQs
FAQs
Will I get a continuous length or separate metres?
When we process orders of dust cover we cut one continuous length to match your order quantity. So for example if you order 4 metres we will supply a single 4 metre length x 1.1 metre wide of material. The maximum single continuous length is 200 metres.
Will this material go brittle or tear?
No, we have sourced a high quality spun bonded material that is designed to not go brittle.
Why has my dust cover gone to dust?
Low quality cheap versions of this spun bonded material are affected by high humidity and in climates that have humidity the material can break down.
What is the maximum single length I can purchase?
200 metres.
Will this fit on my recliner?
Yes, this material is suitable for all upholstered items and just may need a little more skill to fit on some items than others.
How thick is this material?
The weight/thickness is 70GSM, this means the material is reasonably hard to see through and when installed on an item of furniture it is designed to block out the view.
Can this be used on other applications other than upholstered furniture?
Yes, This is a very versatile material.
You may also like…
From $9.00



Heather C
(verified owner)The 5m dust cover arrived promptly and it was an easy product to use to repair underneath my sofa. I was going to do it with some fabric I had but am so glad I got this instead. I had a blast ripping out the disintegrated old cover, cleaning it up and applying the new dust cover. I look forward to using my staple gun again and will use this company again for future projects.
vincent cleary
(verified owner)Great dust cover, so much stronger than the ones these replaced. Easy to put on too, with good delivery time