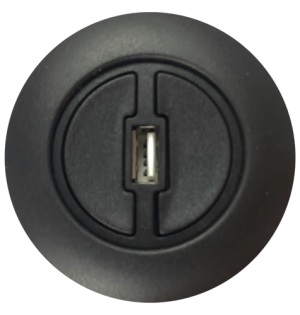
Electric Recliner Spare Parts, Recliner Button Switches, Seat Mounted Buttons
Mulin MLSK24-B Touch Button Switch
$50.00
In stock
Low-profile two-button recliner switch assembly with straight 5-pin DIN lead for powered chairs and lift recliners. Genuine Mulin Electric MLSK24-B unit recess-mounts beneath the upholstery, leaving only the 19mm chrome buttons visible for a sleek finish. Supplied with a 1.5m cable, it suits a 69mm × 31mm cut-out and replaces failed or unresponsive originals in minutes using just a screwdriver. Flush-Fit 2 Button Recliner Arm Switch. A universal swap for most Mulin-wired motion furniture from Harvey Norman, Nick Scali and similar brands. The straight 5-pin DIN plug and screw-on mounting plate make it true plug-and-play for any MLSK24-B or equivalent two-button module. Not the Switch Your Looking For? We stock all the popular recliner switches (click here). If you are still not sure which replacement power recliner chair or sofa switch is right for you please contact our helpful team. read more
In stock
- Description
- Technical Specifications
- How To
- Reviews (0)
- FAQs
- Add a review
Description
Flush-Fit 2-Button Chrome Recliner Switch – Straight 5-Pin DIN Lead
Designed for a sleek, almost invisible finish, the genuine Mulin MLSK24-B recess-mounts behind the arm or seat frame so only its two 19mm chrome buttons are on show. A 1.5m straight 5-pin DIN cable delivers simple plug-and-play replacement for electric recliners, theatre lounges and single-motor lift chairs that use Mulin wiring looms. Cut-out required: 69mm × 31mm × 25mm deep; visible mounting plate: 95mm × 31mm.
Is This the Right Replacement Switch for You?
MLSK24-B is the direct swap for any failed or sticky two-button Mulin module stamped “MLSK24-B”. Commonly fitted to motion furniture sold by Harvey Norman, Amart, Plush and Nick Scali and many other brands that source Mulin electrics. It will not replace four-button MLSK24 variants or touch-sensor “K24-T” styles, nor chairs wired with an eight-pin handset plug. Unsure? Send us a photo and we’ll confirm for you.
We're Australia's Leading Supplier of Recliner Chair Spare Parts
We partner directly with Mulin Electric so you receive genuine OEM components – no guess-work on pin-outs, cable lengths or screw spacing. Every switch is bench-tested before we ship, and it’s covered by our 12-month warranty for complete peace of mind.
Save Time & Money and Do It Yourself
Replacing a side-arm switch takes under ten minutes and a Phillips screwdriver. Follow our step-by-step guide or watch the video in the “How To Tutorial” tab, then enjoy that satisfying click knowing you fixed it yourself and saved $$$ on a service call.
Technical Specifications
Technical Specifications
Technical Specifications
| Item | Specification |
|---|---|
| Brand / Mould Code | Mulin Electric – MLSK24-B |
| Function | Two-button mechanical switch (recline up / down or lift-chair open / close) |
| Connector Type | Straight 5-pin DIN male plug (standard Mulin pin-out) |
| Lead Length | 1.5 m ±30 mm (measured from switch body to DIN shell) |
| Cut-out Size (frame recess) | 69 mm W × 31 mm H × 25 mm D |
| Mounting Plate | 95 mm W × 31 mm H (two rear countersunk Ø3 mm screws) |
| Button Caps | Ø 19 mm chrome-plated; project 8.5 mm beyond plate face |
| Button Spacing | Centre-to-centre distance 50 mm between the two chrome buttons |
| Visible Finish | Black ABS bezel | Satin-chrome caps | No back-lighting |
| Mounting Method | Recess-mounted behind upholstery; secured with 2 × screws (not supplied) |
| Typical Voltage | Low-voltage DC signal (≤30 V) from the recliner control box |
| Compatibility Notes | Direct swap for any MLSK24-B or other Mulin two-button 5-pin module. Not suitable for 4-button MLSK24 variants, touch-sensor K24-T, or 8-pin handsets. |
How To
How To
Step-by-Step Installation Guide
Tools required: Phillips screwdriver, staple lifter, stapler & staples, pliers, torch/flashlight, your mobile phone (for photos), protective blanket or drop-sheet, and a helper if the chair is heavy.
-
Unplug & power down.
Disconnect the recliner from the wall socket and remove any battery-backup packs.
Wait 30 seconds for residual charge to dissipate. -
Safe lifting into service position.
• Clear a work area and spread a blanket to protect the upholstery.
• With knees bent and back straight, tilt or roll the recliner gently onto its side or back.
Ask a second person to share the weight if the chair is heavy or awkward. -
Take reference photos.
Before removing anything, use your phone to photograph the existing switch, cable routing, staples
and the 5-pin DIN plug location. These images are invaluable for re-assembly. -
Remove the old switch.
• Release any fabric flap or dust cover securing the switch area (watch for sharp staples).
• Unscrew the two rear screws holding the MLSK24-B mounting plate and ease the switch body out of the frame.
• Squeeze the chrome buttons back through the upholstery, taking care not to tear the cover.
• Press the DIN plug latch and pull the connector straight out. -
Install the new switch.
• Feed the two chrome buttons through the original upholstery hole so they sit flush on the outside.
• Align the plastic plate with the 69 × 31 mm cut-out and refit the two screws finger-tight, then nip up – do not over-tighten.
• Route the 1.5 m lead along the original path, re-using cable clips or ties to keep it clear of moving parts. -
Reconnect the DIN plug.
Push the 5-pin connector into the control-box socket until it seats firmly and close the retaining clasp.
Match the keyway to avoid bent pins. -
Return chair to upright – lift safely.
With your helper, grip solid frame areas, bend at the knees and keep your spine neutral as you roll
or lift the recliner back onto its feet. -
Test before closing.
Plug the chair into the wall, switch on, and press each button to confirm smooth “Up” and “Down” operation.
If all is well, staple or Velcro the fabric flap back into place.
If any step feels beyond your capability, stop and ask a qualified technician.
Your safety and the integrity of the furniture come first.
Reviews (0)
Thank you for making an effort to leave a reivew but to protect against spam we only accept reviews from verified owners. Please proceed to login using the same email address you used when ordering the product.
Customer Login
- There are no reviews yet.
FAQs
FAQs
How do I know the MLSK24-B will fit my recliner?
Check three things: (a) your existing switch uses a straight 5-pin DIN plug, and (b) the timber cut-out behind the upholstery is roughly 69 mm × 31 mm and (c) the distance between the centre to centre of the buttons is 50mm. If the part code on the old PCB reads MLSK24-B you’re 100 % safe. Not sure? Snap a photo of your switch and plug, then email or live-chat it to us and we’ll confirm before you buy.
Can I change the switch without stripping all the upholstery?
Yes. Only the two chrome buttons pass through the fabric; the body sits inside the frame. You just remove the dust flap or a small staple line, back out two screws, and squeeze the buttons back through the same hole. The main upholstery stays intact.
What’s the difference between straight and right-angle 5-pin DIN plugs?
Functionally they’re identical—only the lead exits at a different angle. Some chairs have tight space behind the arm and rely on the low-profile right-angle DIN. If your plug lies flat against the timber, you need the right-angle model instead of this straight-plug version.
What are the exact dimensions of the switch and lead?
Cut-out (frame recess): 69 mm W × 31 mm H × 25 mm D
Mounting plate: 95 mm W × 31 mm H (two rear screws)
Button spacing: chrome caps are 19 mm Ø and sit 50 mm centre-to-centre
Lead length: 1.5 m from switch body to the start of the DIN plug
Measure your opening and cable reach first; if anything differs, contact us for an alternative model.
Can this switch be mounted in either the armrest or the seat/inside frame?
Yes. The MLSK24-B is designed to recess-mount in any timber section of the chair frame—commonly behind the arm upholstery but just as happy under the seat side-rail if that’s where your original unit was located.