Okin 7 Button USB Switch JLDK.15.08.24
$99.00
In stock
Seven-button brushed nickel side switch with built-in 2A USB charger, designed to control footrest, headrest and lumbar motors plus a 'home' reset on three-motor electric recliners. Model JLDK.15.08.24 uses a 7-pin plug and a 2m loom for a quick arm-frame replacement. Fits either side and installs in minutes with a Phillips screwdriver (no programming required). 7 Button Recliner Chair USB Arm Switch. Universal 7-pin replacement controller for any three-motor electric recliner or lift chair. Brushed-nickel ABS fascia 125mm × 38mm, screws not supplied. Not the Switch Your Looking For? We stock all the popular recliner switches (click here). If you are still not sure which replacement power recliner chair or sofa switch is right for you please contact our helpful team. read more
In stock
- Description
- Technical Specifications
- How To Tutorial
- Reviews (0)
- FAQs
- Add a review
Description
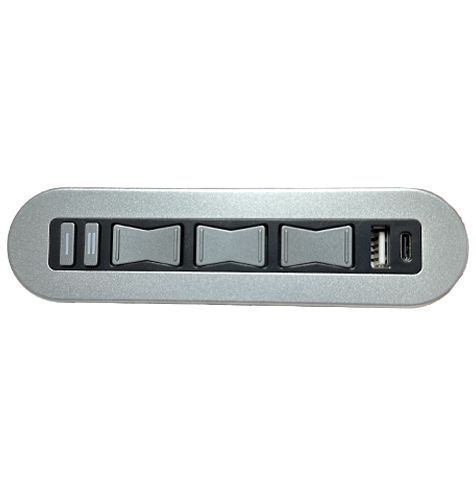
Universal 7-Button USB Recliner Arm Switch – JLDK.15.08.24
Upgrade or replace a worn side switch with this genuine Okin Refined JLDK.15.08.24 controller. The brushed-nickel ABS fascia (125mm × 38mm) mounts flush to the arm frame and gives fingertip control of footrest, headrest and lumbar motors, plus a one-touch Home reset. A built-in 5V ⎓ 2A USB charger keeps phones and tablets powered while you relax.
Seven Independent Buttons for Three-Motor Recliners
Separate ▲▼ controls for footrest, headrest and lumbar let users fine-tune each section, while the Home button brings everything back to the seated position. Perfect for any three-motor recliner, lift chair or “zero-gravity” sofa that uses Okin’s 7-pin control chain.
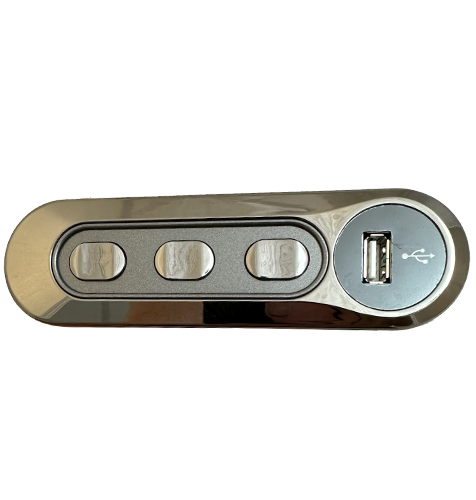
Need the Non USB version of this switch? We stock the all black non USB version as well. To read about and view this switch (click here).
Quality Spare Parts from Sofa Rehab
e stock only genuine or high-grade compatible components so you can be confident of plug matching, voltage rating (29 V ⎓ 2 A) and long-term reliability. Sold as a single switch so you replace only what’s broken—saving money and reducing e-waste.
Save Time & Money and Do It Yourself
Replacement is a five-minute job with just a Phillips screwdriver:
- Unplug the chair from the wall supply.
- Remove the two fascia screws and slide out the old switch.
- Disconnect the 7-pin plug, then connect the new one.
- Seat the new switch in the cut-out and reuse the screws.
That’s it—no programming or pairing required. Follow our step-by-step video tutorials, and if any questions pop up, our phone, email and live-chat support are ready to help.
Technical Specifications
Technical Specifications
| Technical Specifications | |
|---|---|
| Model | Okin Refined JLDK.15.08.24 |
| Product Type | 7-button recliner side switch with integrated USB charger |
| Facia Material / Finish | ABS, brushed nickel |
| Facia Dimensions | 125 mm W × 38 mm H |
| Required Cut-Out | 95 mm W × 27 mm H × 44 mm D clearance |
| Mounting Style | Side-mounted to arm frame (screws not supplied) |
| Button Functions | Footrest ▲ / ▼ Headrest ▲ / ▼ Lumbar ▲ / ▼ Home / Reset |
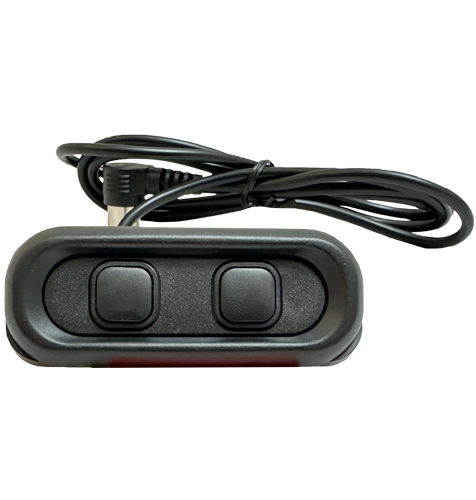
| USB Charger | 5 V DC ⎓ 2 A (inline hard-shell control box) |
| System Voltage | 29 V DC ⎓ 2 A max |
| Cable / Plug | 2 m loom, 7-pin male DIN-style connector |
| Orientation | Fits left or right arm |
| Compatibility Note | For three-motor recliners or lift chairs using an Okin 7-pin control chain. Confirm your existing switch is 7-button / 7-pin before purchase. |
How To Tutorial
How To Tutorial
Step-by-Step Installation Guide
Okin JLDK.15.08.24 7-Button Side Switch with Inline USB Module
- Step 1 – Isolate the power.
Unplug the transformer from the wall outlet and disconnect the low-voltage lead under the chair. Wait 60 seconds for any residual charge to dissipate. - Step 2 – Position the chair safely.
With a helper, tilt or slide the recliner to expose the outer arm frame. Support the frame itself—never lift by the footrest or moving linkages. - Step 3 – Take “before” photos.
Photograph the switch fascia, screw positions, cable routing, the inline USB shell, and the 7-pin plug connection. These images make reassembly fool-proof. - Step 4 – Remove the switch fascia.
Using a Phillips screwdriver, undo the two screws and gently ease the switch out of the 95 mm × 27 mm cut-out. - Step 5 – Unscrew the inline USB control shell.
Follow the cable back to the small hard-shell USB module. Remove its mounting screws or clip so the entire loom can be freed from the arm frame. - Step 6 – Disconnect the 7-pin plug.
Press the release latch (if fitted) and pull the connector straight apart—do not twist the pins. - Step 7 – Route the new loom.
Feed the new switch cable along the original path, keeping it clear of hinges and scissor bars. Plug the new 7-pin connector into the actuator or junction box. - Step 8 – Mount the new USB control shell.
Align the replacement hard-shell USB module in the same location as the old one and secure it with the original screws (or equivalent 6G/8G self-tappers). - Step 9 – Function test before final fix-off.
Briefly reconnect mains power and verify that footrest, headrest, lumbar and Home buttons operate, and that the USB port delivers a 5 V charge. Disconnect power again. - Step 10 – Secure the new switch fascia.
Seat the fascia flush in the cut-out and reuse the two mounting screws. Tighten until snug—do not overtighten, as the ABS faceplate can distort. - Step 11 – Return the chair to position & final test.
Carefully lower or slide the recliner back, reconnect the transformer, and perform a full operational check. Enjoy your fully restored chair!
If you run into any issues, our phone, email and live-chat support teams are ready to help.
Reviews (0)
Thank you for making an effort to leave a reivew but to protect against spam we only accept reviews from verified owners. Please proceed to login using the same email address you used when ordering the product.
Customer Login
- There are no reviews yet.
FAQs
FAQs
How do I confirm this is the correct replacement for my chair?
Match three things: (a) the part-number on your old label must read JLDK .15 .08 .24 (or the mould looks identical with seven buttons and have a USB slot); (b) your furniture must use a straight 7-pin DIN plug for the seat switch; and (c) the chair has three separate motors (footrest, headrest, lumbar). If all three points line up, this panel will drop straight in.
My original switch is on the left arm—will this work?
Yes. The fascia is completely symmetrical; simply rotate it 180 ° during fitting and fasten with the supplied screws. It can be mounted on either the left or right side without modification.
Can I use this to replace a 7-button switch that has a no USB charging port?
Electrically it will still drive the three motors, So yes you can do this.
Will it damage my chair if I only have two motors?
It won’t damage anything, but two of the buttons would have nothing to do. For best results use a switch that matches your actuator count (e.g. a 4- or 5-button panel for dual-motor recliners).