Essentials Leather & Vinyl Repair Kit
$37.00 – $110.00
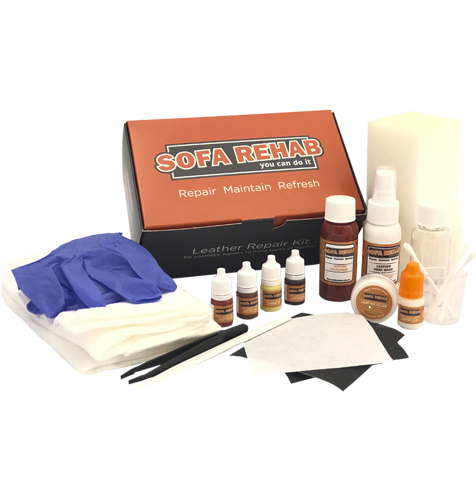
Easy to use Leather & Vinyl Repair Kit, includes everything needed to repair leather lounges & chairs like Leather Paint, glue, filler & all tools. With simple instructions it's easy to make flexible & lasting small cosmetic repairs to pet damage, scratches, holes, rips, tears, scuffs and stains! Repairs are hard wearing & will not rub off! Any Colour Leather Can Be Repaired Using This Kit! Suitable for repairing leather and vinyl of all colours as colour tints supplied. No extra tools required, no prior experience needed. Unsure Which Colour Is Right For You? Visit our Free Leather Samples page and we'll send you 6 free colour samples of your choice! We can even custom make your leather colour. Ask us how! read more
Description
Achieve Near Invisible Repairs - No Technical Ability Required!
The Essentials Leather & Vinyl Repair Kit is a complete cosmetic repair kit available in multiple sizes. Everything in this kit is included for you to be able to carry out near invisible small cosmetic repairs, no additional tools or prior experience required. Our repair products offer flexible rub resistant results with maximum adhesion for hard wearing long lasting repair performance. Just read our product reviews from previous customers to see how!
Prep Wash, Glues, Fillers, Paints and All The Tools!
Included in every Essential Leather & Vinyl Repair Kit is the Leather Prep Wash to prepare the area, Leather Glue for repairing cuts and rips, Leather Filler for filling holes, edges of cuts and blending scuffs in, Leather Paint for final colouring and all the tools from applicators to sponges, in fact all you need to do is follow the instructions and be amazed at the results!
All-In-One Leather & Vinyl Paints
Sofa Rehab’s Leather & Vinyl Paint is a all-in-one bottle coloured leather paint which has been exclusively developed by our team to be completely compatible with all our repair products to ensure high performance adhesion properties, self sealing technologies providing hard wearing long lasting cosmetic repair results. Simple apply, dry and clean regularly is all that’s needed.
Available in Over 40 Colours. Need Help?
With over 40+ popular colour options available, you will be sure to find something that matches your leather. Simply order the paint colour nearest to your leather or vinyl colour and then simply adjust the paint to match perfectly using the included tints. To ensure you order the right leather repair kit, request 6x free leather samples from us before you purchase.
Video Tutorials and Step-By-Step Guides
With our wide range of repair products, our easy step-by-step instructions and video tutorials, you’ve got everything you need to repair it yourself. Feel great about having done the repair yourself and saved $$$ on the repair.
What Can be Fixed?
What Can be Fixed?
This is a guide to common repairs possible with this kit!
Pet Damage – Cat claw pulls and tags, dog scratches and teeth marks.
Torn Leather – Nicks, splits, rips, cuts and torn leather.
Grazes – Scuffs, rubs, bruises and scratches.
Holes – Burns and Holes.
Colour issues – Loss of colour and fading (Painted leather only).
Stains – Coffee and tea, wine stains, ink and general wear and tear (not body, head or hair oils or grease).
Children – Shoe buckles, fingernail scratches, zipper heads and damage from toys.
Whats in the box?
Whats in the box?
The 50ml Kit is suitable for coverage of approximately 1x armrest or standard seat. Click here to view the 50ml kit size.
- 1x 50ml colourant
- Up to 4x 5ml tinters
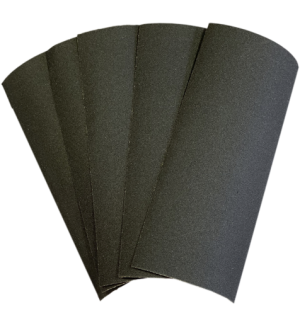
- 1x 400 grit sandpaper
- 1x 600 grit sandpaper
- 1x Support patch
- 1x 5ml leather glue
- 1x 50ml Leather Prep Wash
- 1x 10g leather filler
- 1x Pair of tweezers
- 1x Palette knife
- 1x Mixing cup
- 1x Empty 50ml bottle and cap
- 1x Lint free cloths
- 1x Touch up sponges
- 3x Touch up tips
- 1x Pair latex gloves
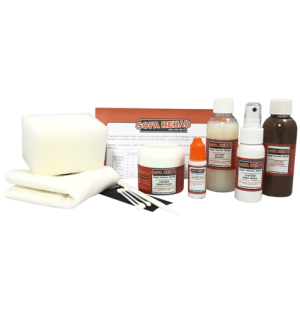
The 125ml Kit is suitable for coverage of approximately 2-3 seat panels. Click here to view the 125ml kit size.
- 1x 125ml colourant
- Up to 4x 5ml tinters
- 1x 400 grit sandpaper
- 1x 600 grit sandpaper
- 1x Support patch
- 1x 5ml leather glue
- 1x 50ml Leather Prep Wash
- 1x 10g leather filler
- 1x Pair of tweezers
- 1x Palette knife
- 1x Mixing cup
- 1x Empty 125ml bottle and cap
- 1x Lint free cloths
- 1x Touch up sponges
- 3x Touch up tips
- 1x Pair latex gloves
The 250ml Kit is suitable for coverage of approximately 3x large seat panels and 2x armrest panels. Click here to view the 250ml kit size.
- 1x 250ml colourant
- Up to 4 x 15ml tinters
- 2x 400 grit sandpaper
- 2x 600 grit sandpaper
- 1x Support patch
- 1x 15ml leather glue
- 1x 50ml Leather Prep Wash
- 1x 10g leather filler
- 1x Pair of tweezers
- 1x Palette knife
- 1x Mixing cup
- 1x Lint free cloths
- 1x Touch up sponges
- 3x Touch up tips
- 1x Pair latex gloves
Coverage – Approximately 1x Large three-seater (complete). Click here to view the 500ml kit size.
- 1x 500ml colourant
- Up to 4x 15ml tinters
- 2x 400 grit sandpaper
- 2x 600 grit sandpaper
- 1x Support patch
- 1x 15ml leather glue
- 1x 50ml Leather Prep Wash
- 1x 10g leather filler
- 1x Pair of tweezers
- 1x Palette knife
- 1x Mixing cup
- 1x Lint free cloths
- 1x Touch up sponges
- 3x Touch up tips
- 1x Pair latex gloves
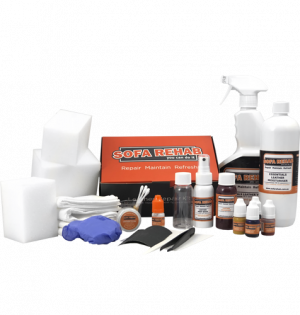
The 1 litre kit is suitable for coverage for approximately 1x large three-seater and 2x arm chairs (complete). Click here to view the 1 litre kit size.
- 1x 1 litre colourant
- Up to 4 x 30ml tinters
- 2x 400 grit sandpaper
- 2x 600 grit sandpaper
- 2x Support patch
- 1x 30ml leather glue
- 1x 125ml Leather Prep Wash
- 1x 25g leather filler
- 1x Pair of tweezers
- 1x Palette knife
- 1x Mixing cup
- 1x Lint free cloths
- 1x Touch up sponges
- 5x Touch up tips
- 1x Pair latex gloves
How To Tutorial
How To Tutorial
Essentials Leather Repair Kit Instructions
To achieve a successful repair, use the table below to establish which fault description best matches your leather damage and follow the steps in numerical order that follow. Always start with step 1 1,2.
Example for scratches: Step 1 Prep Wash, Step 2 Bond, Step 3 Filler, Step 4 Sand, Step 5 Wipe Clean and Step 6 Colourant.
| Fault | |||||||
|---|---|---|---|---|---|---|---|
| Scratches | Cut/Tear | Hole/Burn | Graze | Worn/Faded | Nick | Stains | |
| Prep Wash | 1 | 1 | 1 | 1 | 1 | 1 | 1 |
| Trim Area | 2 | 2 | 2 | ||||
| Sand | 4 | 7 | 7 | 5 | 2 | 4 | 2 |
| Bond | 2 | 5 | 5 | 3 | 2 | ||
| Sub Patch | 4 | 4 | |||||
| Filler | 3 | 6 | 6 | 4 | 3 | 1 | |
| Wipe Clean | 5 | 3+8 | 3+8 | 6 | 3 | 5 | 3 |
| Colourant | 6 | 9 | 9 | 7 | 4 | 6 | 4 |
Step 1 – Prep Wash
Spray over & around the repair area and wipe away and dirt, oils and contaminants with the lint free cloth, then allow to try.
Step 2 – Trim
Remove any frayed, loose or unwanted fibres. For burns, cut away the burnt leather to leave clean edges.
Step 3 – Sand
Using the 600 grade grit paper, gently sand the repair area to remove any rough spots or to level any filler used.
Step 4 – Bond
Ensure the surfaces are dry. Apply glue to all surfaces and bring them together. Hold the surfaces together until the glue has set. Using a hairdryer will help speed up the process. Before carrying out the next step, the glue must be left for a minimum of 24 hours to achieve the maximum hold.
Step 5 – Sub Patch
Trim the patch to approximately 20% bigger than the damaged area. Using the tweezers, slide the patch into position behind the hole and apply glue to one side of the sub-patch and the back side of the leather. Using the palette knife to assist with this and bring the two surfaces together. Repeat until all surfaces are touching and allow to set. Using a hairdryer will help speed up the process.
Step 5 – Filler
Using the palette knife, apply thin layers of filler (removing excess between each layer) and allow to fully dry between layers. Once each layer is dry, sand if required. Use a hairdryer to speed up the drying process.
Tip – leather colourant can be added to wet filler to tint the filler colour, achieving a closer shade to the leather colour. Place a small amount of filler in the mixing cup and add a few drops of tinter until the desired colour is achieved.
Step 6 – Wipe Clean
Dampen the lint free cloth with water and wipe over & around the repair area.
Step 7 – Colourant
If required and once colour match has been achieved using our tints, use either a cotton tip or the touch up sponge to dab, wipe or brush the colourant in thin even coats, and fully dry in between each coat. Use a hairdryer to speed up the process.
Tip – feather the repair outwards during application as a final step and gently massage the area to relax the surface and blend in.
Leather Tint process – If required, add the required tinters in very small quantities. Test and dry the colourant between each additional tint until the required colour match is achieved. Please note the colourant will dry darker. For lighter colours, always add darker tints in very small quantities.
Sofa Rehab will supply 5ml, 15ml or 30ml tint (depending on size of kit) of each colourant used to produce the base colour.
Video tutorials can be found on the Sofa Rehab YouTube channel or for any technical support, call 07 2111 4088.
- Before commencing any repair, always pre-test the products in an inconspicuous area.
- Please note any use of our products will only be successful on a real leather or vinyl surface that is in fair/good condition, clean and free from contaminant such as oils, dirt and grime.
Reviews (32)
Thank you for making an effort to leave a reivew but to protect against spam we only accept reviews from verified owners. Please proceed to login using the same email address you used when ordering the product.
Customer Login
FAQs
FAQs
How do I fix scuffed leather?
Use our Essentials Leather repair kit to repair scuffs and scraped leather as per below procedure-
1, Firstly you clean the area with leather prep wash
2, Sand and glue any loose edges down
3, Apply leather filler to even out any holes, nicks or remaining scratches etc
4, Sand again to smooth off any raised areas
5, Wipe clean with leather prep wash
6, Lastly apply leather colourant to colour over the repair work to blend in the damage. Use a dabbing motion to start off and progress to wiping over the colourant as the coats are applied to even out the finish.
We recommend you use the Sofa Rehab Essentials Leather repair Kits.These kits contain all you need to carry out minor cosmetic repairs. We even have handy video tutorials showing how to use the kits.
How to fix cat scratches in leather?
Use our Essentials Leather repair kit to repair cat claw scratches in leather as per below procedure-
1, Firstly you clean the area with leather prep wash
2, Sand and glue any loose edges down
3, Apply leather filler to even out any holes, nicks or remaining scratches etc
4, Sand again to smooth off any raised areas
5, Wipe clean with leather prep wash
6, Lastly apply leather colourant to colour over the repair work to blend in the damage. Use a dabbing motion to start off and progress to wiping over the colourant as the coats are applied to even out the finish.
We recommend you use the Sofa Rehab Essentials Leather repair Kits.These kits contain all you need to carry out minor cosmetic repairs. We even have handy video tutorials showing how to use the kits.
How to fix a rip, cut, tear or hole in a leather couch?
Use our Essentials Leather repair kit to repair minor rips, cuts, tears and holes in leather as per below procedure-
1, Firstly you clean the area with leather prep wash
2, Sand and glue any loose edges down
3, Apply leather filler to even out any holes, nicks or remaining scratches etc
4, Sand again to smooth off any raised areas
5, Wipe clean with leather prep wash
6, Lastly apply leather colourant to colour over the repair work to blend in the damage. Use a dabbing motion to start off and progress to wiping over the colourant as the coats are applied to even out the finish.
We recommend you use the Sofa Rehab Essentials Leather repair Kits.These kits contain all you need to carry out minor cosmetic repairs. We even have handy video tutorials showing how to use the kits.
How to fix pet damage on leather furniture?
Use our Essentials Leather repair kit to repair pet damage on leather as per below procedure-
1, Firstly you clean the area with leather prep wash
2, Sand and glue any loose edges down
3, Apply leather filler to even out any holes, nicks or remaining scratches etc
4, Sand again to smooth off any raised areas
5, Wipe clean with leather prep wash
6, Lastly apply leather colourant to colour over the repair work to blend in the damage. Use a dabbing motion to start off and progress to wiping over the colourant as the coats are applied to even out the finish.
Our repair kits contain all you need to carry out minor cosmetic repairs. We even have handy video tutorials showing how to use the kits.
Can I use this kit on car seat leather interiors?
Yes, in fact it is suitable for anything made of leather or vinyl.
Can this kit fix cracked leather?
No. This kit is for damaged leather like rips, cuts, pet damage and scuffs etc. We do sell a crack repair kit designed specifically for cracking on leather.
How do I know if my leather can be fixed?
We have specially trained leather restoration technicians in our team, please contact us via FB messenger or by email. If you can send pictures of the issues we will give free honest professional advice on if its fixable or not.
Does this kit include tints?
Yes. It includes upto 4 individual colours, you can add these in small quantities to adjust the main bottle of colour. The 4 tints colours vary depending on the colour kit you've ordered.
Does this kit work on all leather?
No!
It does work very successfully on the following leather types
Pigmented/protected leather (most common leather found on furniture and car seats and door trims interiors)
Vinyl and bonded leather (Will not fix delaminating on bonded surfaces)
Semi Aniline
It is not ideal for use on the following leather due to the colourant being a pigment (solid colour) and not a transparent dye. The products still repair the leather however the colourant will appear as a paint and not a dye on the surface, if you need to just secure the damage and stop it getting worse then this is an option
Aniline, waxed or oiled pull up
And not suitable for use on the following
Nubuck or Suede
Plastic or fabric
You may also like…
$98.00 – $215.00
Essentials Leather Crack Repair Kits
$97.50 – $190.00
Ultimate Leather Repair Kit
Related products
$99.00 – $162.80
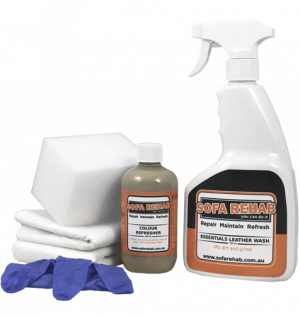
Essentials Leather Wash and Colour Refresher Kit
$23.00 – $85.00


David Jamie
(verified owner)The coloring with the kit did an excellent job at covering up wear marks on the sofa.
COLIN HUGHESDON
(verified owner)Never used the product before. The problem was elbow wear on armrests of leather recliner. The kit was easy to use and the finished product achieved an excellent repair which no one will notice.
Bianca
(verified owner)The leather repair kit is amazing! Before ordering I ordered the free samples, so the colour match was perfect. My couch looks brand new!
Kaye and Marcus Holdsworth
(verified owner)Great product, came fast and was very easy to use and did a great job on my cat scratched lounge
Gaye
(verified owner)Was unsure if I was wasting my money but took the plunge and wow am I pleased I did. My leather chair looks so good and the color match was so close. Top marks
Robert Burrough
(verified owner)I was doubtful this would repair our badly damaged headrest area of our leather lounge. But, I thought I had nothing to loose so I gave it a try.
I cut a tiny sample of our leather away from underneath the recliner where that cannot be seen & sent that to Sofa Rehab to hopefully match our colour.
I’ve just completed the repair & colour now. The colour match is perfect & now I cannot see where the damage was. Marvellous product. Thank you.
Patricia Gordon
(verified owner)The repair kit is easy to use, the tutorials are so helpful! I ordered the three samples and was able to match the colour perfectly. Very happy with the results and would certainly recommend. Service was prompt too.
Katrina Bourke
(verified owner)Awesome product, great technical assistance, prompt response on support questions and delivery of samples. Ended up having my leather colour matched. I achieved an even greater outcome than expected. Love it !
Lorraine Frost
(verified owner)Very good communication by the supplier prior and until I received the kit. I am very happy, I thought that I might need to get new squabs for my couch, but the repair kit has worked perfectly. Such a surprise, so thank you for your innovation.
david
(verified owner)excellent product the two leather lounge chairs where scratched very bad by my sons dog you cannot see the scratches anymore would recommend love the result
Denise
(verified owner)Was amazing so pleased with the results. colour match was perfect repaired the tear and claw marks from the cat
Nelly Pashayan
(verified owner)Great service, fast delivery, good product, I did not even use the glue and my dining chairs look as new, just filler and the colour worked great. I loved the fact that you have enclosed blue and green colours with the repair kit. It came really handy in getting the tint colour right. I would never think of it myself, Thanks you
Genevieve Neale
(verified owner)If I could attach my before/after phtotos I would, because I am so pleased with the results of the repair. The service was marvellous, providing the free samples and later delivery was quick. Advise was excellent – they weren’t going to sell me anything when I sent photos of the damage their technician deemed irreparable. I did however used the kit to repair bits that I could using the sub patch and filler and then together with another patch product, everything was blended in with the colourant (with minor adjustment with the tints). The repair looks so much better than I hoped – almost professional – if I may say so myself.
Fibi
(verified owner)Very good products saved my couch fr the dumpster damage from spilt nai polish. Blend in with the in nail polish leaving no sign of nail polish and no wash off when the dyed section is cleaned. Truly awesome
Ritchie
(verified owner)This product is wonderful and does the job quite well. Instructions are easy to follow and the video tutorials are also very helpful. Used it to repair my bonded leather office chair which was peeling quite extensively. Results are good but not perfect as I find the filler dries on quite thick, and you end up being able to actually feel the difference between the original and repaired sections. Probably better suited to real leather but then again maybe I applied too much filler. So only 4 stars but still I’m happy in the end. Maybe you could also develop a sealant product of some sort that would stop further peeling and cracking of bonded leather? Just a suggestion.
Rhonda
This was very easy to use. Loved the end result. The video was most useful in get the finish correct. We had to deal with well worn arm rests which included a split. The chair now looks great again.
Adie
(verified owner)Simple process to follow. Tutorial is excellent. Would highly recommend to those wanting to repair items themselves
Vishal Batra
(verified owner)No need to be professional just their videos are enough to repair
I got my sofa done and my home inspection went really went Thanks sofa rehab for the kit
Nina
(verified owner)Great kit, instructions were easy to follow
Judi
Awesome products, sofa repair results amazing! Can’t even see where the cat had damaged the sofa now 🙂 I have photos if Sofa Rehab would like?
Des Walters
(verified owner)Great company to deal with and the product works just like the tutorials show. I would not hesitate to use it again and highly recommend this company
Jan Quigg
(verified owner)This product really works. No more cat scratches on my lounge. Looks great.
Lisa Sewell
(verified owner)This is such a great repair kit. Once we got the colour match right, it was so easy to use. We had a scratch mark to repair on a leather car seat and after using this repair kit I couldn’t fault it. The scratch had completely been repaired. So happy with the end result. I highly recommend this product to repair your leather scratches.
Ms Carmel De Luca
(verified owner)Easy to use and wonderful results.
Used to cover cat scratches on my couch.
I was really impressed with the end results.
Would definitely recommend.
Stephen Zander
(verified owner)Worked well on one sofa. Still working on another.
Paul smith
(verified owner)Never used the product had a worn arm rest which had developed into tear. Repair the tear, filled the cracks and colour matched. To look as good as new really happy with the result
Garry Carpenter
(verified owner)Very comprehensive kit, very easy to use with great instructions.
Their service was immediate to our our query, and the the price very reasonable.
Wendy Boyle
(verified owner)Wow! I am so impressed with the sofa repair kit. I have just finished repairing my recliner/rocker armchair. If you follow the instructions you can make your damaged leather look as good as new. My cats made a terrible mess of the front sides of my chair but now it looks like new. I was surprised at how little of the product is needed. I will have enough to do the other armchair and the couch. It’s not often you come across a product that does exactly what the supplier claims but this is one of those products. I am very happy with my purchase!
LesleyRaeOrr
After 2 years of periodic touch ups of one squab with colour refresher I used (some of) a small Essentials Leather Repair kit and achieved great finish. The leather prep wash, leather filler and 600 grit sandpaper have improved the only noticeably worn squab so much it looks like the
remaining 4 squabs. No more flaky, cracks and dry scratchy feel on the leather now. After 6 thin coats of leather colourant the feel and colour of the most damaged squab is so good it’s indiscernable from the rest of the lounge.
Nick Mandikos
(verified owner)I bought a black and a Deep blue colorant as well as 2 x essentials Leather repair kits for the grand total of approx $180. as opposed to a quote from a “leather doctor” for $3800. The kit did a great job. the repairs were easy to carry out, and the colour match was perfect. Its good to have my furniture back in its original condition for that price. I’m extatic. Thank you Sofa Rehab,
and 5 stars to you.
Rick
(verified owner)We followed the instructions (plus the video) and it worked perfectly. The repaired area is invisible to anyone but us.
Karen
(verified owner)Very fast delivery. So easy to use. Although there was a slight problem with the standard colour I ordered the team were great in helping me resolve the problem