Okimat 3H4/6 Bed Motor 1.05.000.466.30
$385.00
Out of stock
Replacement Okin Okimat 3H4/6 double-drive actuator set, labelled 1.05.000.466.30 or 9.05.000.455.30, supplied complete with six-button handset 1.11-001.30NC04R and a factory-fitted AU/NZ two-pin power lead. Twin 3500N motors and an internal transformer deliver smooth, independent head- and foot-section movement, getting your adjustable bed back in action fast. Replacement Okimat Twin Motor Drive & Remote. Compatible with Okimat 1.05.000.455.30, IPS 1.0.000.884.30, Okimat 2SL 26161 and Duomat 5 30075, it hooks onto the standard 58 cm centres and connects via the 5-pin DIN plug for an effortless plug-and-play swap. Need a Different Okin Model? See our full selection of electric bed spare parts (click here) including handsets, leads and extra actuators. If you’re unsure which Duomat you need, contact us and our technicians will guide you. read more
Out of stock
- Description
- Technical Specifications
- How To
- Reviews (0)
- FAQs
- Add a review
Description
Okimat 3H4/6 Twin Motor Replacement Kit – Complete with Handset & AU Power Lead
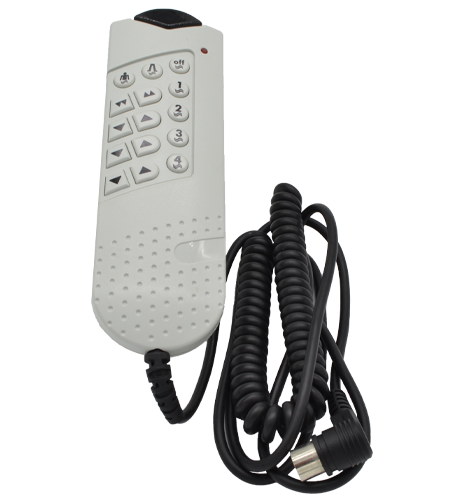
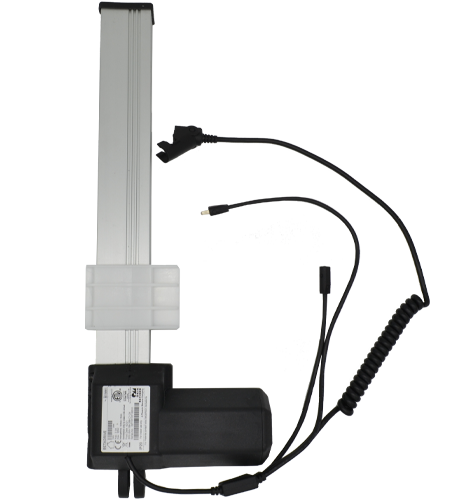
Restore smooth, independent head-section and foot-section movement to your electric bed with this genuine Okin Okimat 3H4/6 double-drive unit. Two powerful 3500 N actuators, an internal 100-240 V transformer and control PCB all live inside one low-profile housing, and the mains lead is already hard-wired with an AU/NZ two-pin plug. We include the matching six-button handset (model 1.11-001.30NC04R, 5-pin DIN) so the set is a direct, fuss-free swap for your original drive.
Compatible Models & Part Numbers
- Okimat 3H4/6 – 1.05.000.466.30 (this listing)
- Okimat 3H4/6 – 9.05.000.455.30
- Okimat 3H4/6 – 1.05.000.455.30
- Okimat IPS – 1.0.000.884.30
- Okimat 2SL – 26161
- Duomat 5 – 30075
If the label on your existing drive shows any of these codes – or you measure the same 58 cm hook-to-hook spacing – this kit will slot straight in. Unsure? Send us a photo and our tech team will confirm for you.
All-in-One Design for a Tidy, Reliable Bed
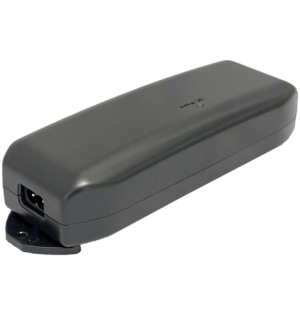
- No external “brick” – the transformer is built into the housing for a cleaner under-bed space.
- Low standby draw (< 0.5 W) helps cut power bills.
- Emergency lowering – fit two 9 V batteries (not included) to return the bed to flat during a blackout.
- High-thrust 3500N motors handle heavier latex and hybrid mattresses with ease.
- Quiet worm-gear drive lets you reposition without disturbing your partner.
Genuine Quality Spare Part from Sofa Rehab
Buying a genuine Okin replacement ensures the gearbox ratios, stroke lengths and limit switches match the original bed mechanism, avoiding sync errors or overload trips. Each unit ships factory-sealed, ready to slide onto the metal rails with the existing mounting plates (no special tools required) and includes a mains lead with AU plug.
You Can Do It — DIY Installation in Minutes
Replacing a faulty bed actuator is a straightforward DIY task: unplug the bed, remove two axel covers, swap the drive, and reconnect the handset and mains lead – typically a ten-minute job. Follow our step-by-step guide in the “How To Tutorial” tab to get your adjustable bed working again today. Enjoy the satisfaction of a job well done and the savings from avoiding an in-home service call!
Technical Specifications
Technical Specifications
Technical Specifications
| Drive Model | Okin Okimat 3H4/6 – 1.05.000.466.30 (cross-compatible with 9.05.000.455.30) |
|---|---|
| Actuator Configuration | Twin DC motors (independent head & foot sections) inside single housing |
| Rated Push Force | 3500 N per motor (≈ 357 kgf) |
| Stroke Lengths | Head: 87 mm | Foot: 69 mm |
| Hook Spacing (centre–centre) | ≈ 580 mm (standard Okimat / Dewert frame hooks) |
| Mains Input | 100–240 V AC, 50/60 Hz | Class II appliance |
| Power Lead | Factory hard-wired 2-pin AU/NZ plug, 3 m length (Approx) |
| Standby Consumption | < 0.5 W (IPS eco-mode electronics) |
| Duty Cycle | Max 2 min ON / 18 min OFF, up to 5 cycles per minute |
| Emergency Lowering | 2 × 9 V battery socket (batteries not included) |
| Handset Included | Model 1.11-001.30NC04R – 6-button, 5-pin DIN plug, 1.8 m lead (approx) |
| Ingress Protection | IP 20 (indoor use only) |
| Operating Temperature | +5 °C to +40 °C |
| Weight (drive only) | ≈ 7.5 kg |
| Certifications | CE, RCM, EN 60335-1, EN 60601-1-2 |
How To
How To
Step-by-Step Installation Guide
Important: Unplug the bed from the wall before starting and follow safe lifting practices. If the base is heavy, ask someone to assist you.
- Photograph the existing setup
Use your phone to take clear photos of the current drive unit, hook positions and handset wiring. Having a visual reference makes reassembly fool-proof. - Isolate power
Disconnect the mains plug from the wall socket and wait 60 seconds to ensure all capacitors discharge. - Raise the bed for access
With the power off, manually tilt the frame on its side or elevate it on blocks so you can comfortably reach underneath. Keep your back straight and lift with your legs – never twist while holding weight. - Release the hook clips
Locate the two spring clips that lock the drive’s hooks to the frame levers. Using a flat-blade screwdriver, gently pry each clip outward and slide it off the hook. Keep the clips safe for reuse. - Unplug the handset lead
Follow the 5-pin DIN cable from the handset to the drive housing and pull the plug straight out – avoid bending the pins. - Remove the old drive
Support the weight of the unit with one hand while lifting each hook free from its lever. If resistance is felt, rock the drive slightly to disengage. Lower it carefully to the floor. - Hook the new drive in place
Align the new hooks with the levers (head motor toward the pillow end). Lift with your legs, not your back, and seat both hooks fully. - Refit the retention clips
Slide the metal clips back over each hook until they snap into the frame holes. This locks the drive so it cannot dislodge during operation. - Connect the handset
Insert the 5-pin DIN plug from the new handset into the matching socket on the drive until it clicks. Compare to your photo to confirm orientation. - Restore power and test
Plug the two-pin AU/NZ mains lead into the wall and switch on. Using the handset, cycle head and foot sections through a full up-and-down movement to verify smooth travel. - Final safety check
Lower the bed to flat, remove any blocks, and ensure all tools are clear. Verify the mains cable is routed away from pinch points before everyday use.
If you encounter any difficulty at any stage, pause and contact our support team – we’re here to help.
Reviews (0)
Thank you for making an effort to leave a reivew but to protect against spam we only accept reviews from verified owners. Please proceed to login using the same email address you used when ordering the product.
Customer Login
- There are no reviews yet.
FAQs
FAQs
Is this a genuine part?
Yes, this is a genuine Okin part, a Phoenix Mecano brand.
How do I know this drive will fit my bed?
Check the rating label on your current unit. If it shows any of these codes — 1.05.000.466.30, 9.05.000.455.30, 1.05.000.455.30, 1.05.000.884.30, Okimat 2SL 26161 or Duomat 5 30075 — this kit is a direct swap. Another quick check is the hook spacing: if it’s roughly 58 cm centre-to-centre and your handset uses a 5-pin DIN plug, you’re good to go. Still unsure? Snap a photo and send it to our support team for confirmation.
Can I keep using my existing handset?
Yes—if your current remote ends in a standard 5-pin DIN plug it will work fine. Many customers keep their old remote as a spare. We include a brand-new six-button handset in the box, fully compatible and ready to use.
Does the emergency lowering feature come ready to use?
The battery socket is pre-wired inside the drive. Just clip in two fresh 9 V alkaline batteries (not supplied) and the bed can always return to flat during a blackout.
The motor runs but nothing moves—what should I check?
Make sure both hooks are seated fully in the frame levers and the metal retaining clips are locked in place. If a hook is riding on top of the lever the shaft can spin without lifting the bed. Reseat the hooks, refit the clips and test again.
Is this a DIY-friendly job? What tools and time should I allow?
Absolutely. Remove the two axle pins (circlip pliers or screwdriver), unplug the handset and IEC lead, slide the old unit out, slide the new one in and re-pin—typically 10 minutes. No electrical skills, programming or voltage setting is required; everything is plug-and-play.